
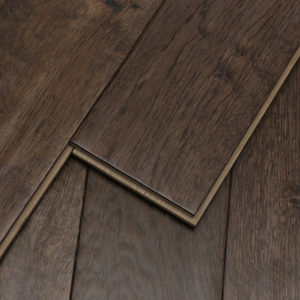
Solid wood flooring not only enhances the home interiors but also increases the value of your property. Over time, due to wear and tear, wood floors start showing scratches and lose shine. In that case, the shine can be brought back by refinishing the wood flooring. Whether you have a normal wood floor or herringbone engineered wood flooring, this guide will help you.
Get rid of the shoe base moulding
The shoe base moulding, affixed by the wall, needs to be taken off carefully to prevent any breakage. Start by pulling it out with a pry bar, being careful to save your baseboards. Proceed to step 2 if there is no base moulding.
If you have oak herringbone flooring, you can seek the help of experts instead of doing it yourself.
Use putty to fill up the scratches & holes
The next step is to look for any scratches, creeks, holes or loose floorboards. You need to fasten the 8d nail into a floor joist. Any nails that are sticking out should be driven in. Then, using a putty knife, fill up all of the holes with the wood putty.
Floorboards Sanding
Once the putty dries, the next step is to sand your floorboards. You may get rid of stains and scratches with this method. The ideal tool is a drum sander, which you can rent. Don’t forget to swap out the drum sander’s abrasive belt every time you cross 200 square feet.
Use a belt of sandpaper with 36–40 grit first. Slowly progress to higher grit up to 100. For optimal results, use coarse sandpaper at the beginning and then later pick fine sandpaper.
If you have herringbone engineered oak flooring, you will only be able to refinish it once or twice during its lifetime, depending on the thickness of the top real wood layer.
Keep Cleaning The Floor
Make sure to sweep and vacuum the floor in between the sanding of the surface. In order to avoid damaging the surface with the finer-grit sandpaper, it is important to eliminate any dirt or debris that was present on the surface from the prior step of sanding.
Sand Edges
Start by using the sanding edger to sand every edge, closet flooring, and difficult-to-reach places of your wood floor. If you don’t know how to use a sanding edger, then you better practise using it on a useless piece of wood.
When using the edger and the drum sander to sand your floorboards, you must utilise identical grades of sandpaper. As done in the previous step, keep changing the sandpaper from coarse to finer grain. And remember to sweep and vacuum the floor each time you sand.
Smoothening the Surface
Your hard work will not go in vain. You will your flooring will get a new lease of life by the end of this drill.
All little roughness that you might find after all the sanding will be even off by using a floor buffer all over the surface. All of your undesired scratches will be removed by this step. Utilise this machine by cutting wide arcs over your flooring to achieve a smooth appearance.
Final Sweeping
It is time for one more thorough sweeping and vacuuming before moving on to the last two processes. You would want your floor to be properly cleaned without any traces of dust before you apply the stain and finish.
How to Stain Wood Floor
It’s crucial to properly stain floors toward the wood grain. You should work on a smaller area when refinishing your solid wood floors. Use a cloth to clean away any access stains as you move along in the procedure.
How to Finish Hardwood Floors
Applying a wood finish to your engineered flooring is the last step. Before you go ahead with the wood finish application, be careful to give the stain time to cure.
Using an applicator, you can apply the wood finish. Several wood-finish options are available on the market. An oil-based polyurethane finish is what we advise using since it cures more slowly, allowing you additional time to cover up mistakes.


: Simone Lutgert Gomez Net Worth, Career, Achievements, And All Other Info")


